
NetSuite Check Printing and Mailing Integration
You already approved the bill in NetSuite. Zil Money imports the supported vendor and bill details so you can print the check or send it for mailing, without retyping anything.
View the NetSuite Setup Guide →
Connection requires a NetSuite Account ID and Token-Based Authentication credentials.
Zil Money is not affiliated with or endorsed by Oracle NetSuite.
Import supported bills
Bring supported NetSuite bill and payee information into Zil Money for payment.
Print vendor checks
Review payment details and print business checks from the Zil Money workspace.
Mail checks online
Send checks to vendors without preparing envelopes or postage yourself.
Cut repeat data entry
Payee and bill details import instead of getting retyped by hand.
Field availability, mailing options, and feature access depend on your NetSuite and Zil Money account setup.
The Gap Between an Approved Bill and a Paid Vendor
You already approved the bill in NetSuite. Now someone still has to pull the vendor name and amount, prepare a check, print it, find an envelope, add postage, and get it to the mailbox. One vendor still won’t take anything but a paper check. Half the team hasn’t touched the check printer since the office went hybrid.
None of these steps are hard on their own. Together, they eat a chunk of an AP team’s week. Zil Money does not eliminate every manual step in accounts payable. It replaces the retyping between your NetSuite bill and a mailed check in a vendor’s hand with an import step, and moves check preparation into the same workspace where you already reviewed the bill.
How the NetSuite Check Printing Integration Works
Connect NetSuite
Authorize with your Account ID and Token-Based Authentication credentials.
Import records
Bring supported vendor and bill records into Zil Money.
Review details
Confirm payee, amount, and funding account.
Print or mail
Print it yourself or send it for mailing.
Review activity
Track check payments in Zil Money.
What you’ll see and how often it updates depends on how your NetSuite account is set up and what’s turned on in your Zil Money account.
Printing vs. Mailing: Which Fits Your Team?
Print checks yourself
Best for in-office teams with a printer and check stock on hand
- Printer required Yes
- Check stock required Yes
- Envelopes & postage Manual
- Staff involvement Higher
- Delivery Your local mail pickup
Mail checks through Zil Money
Best for remote teams and out-of-state or check-only vendors
- Printer required No
- Check stock required No
- Envelopes & postage Included in the service
- Staff involvement Lower
- Delivery Third-party carrier
Print Checks from NetSuite
After supported bill and payee information is imported, review the payment details and prepare business checks through Zil Money in the same workspace, instead of a separate manual process.
Before printing, confirm:
- Payee name
- Amount
- Issue date
- Funding account
- Check number
- Printer and check stock setup
Printer, check stock, account, and feature requirements may apply.
Mail Checks from NetSuite
A business may prefer check mailing over in-house printing when a vendor only accepts checks, the finance team works remotely, the company does not want to maintain check printers or check stock, staff want to avoid handling envelopes and postage, or the business sends checks to vendors in multiple locations.
Import or select the supported NetSuite bill.
Review the payee and payment information.
Select check mailing where available.
Confirm the recipient’s mailing address.
Submit the check for processing.
Review mailing and payment status.
Mailing options, processing times, delivery estimates, and fees depend on the selected service, recipient address, account setup, and third-party carrier availability.
What NetSuite Records the Integration Can Use
| Record category | How it may be used | Important limitation |
|---|---|---|
| Payees or vendors | Imported to prepopulate check recipient information | Exact field availability must be confirmed during setup |
| Bills | Imported for review and payment | Not every bill field may transfer; review before printing |
| Invoices | May be available depending on account configuration | Exact field availability must be confirmed during setup |
| Payment information | Reviewed in Zil Money before a check is created | Amount, payee, and account fields require manual confirmation |
| Payment status | Tracked within Zil Money after a check is processed | Treat as a one-way import unless Zil Money confirms write-back for your account |
How to Connect NetSuite to Zil Money
Quick answer: Sign in to Zil Money, open Services, select App Integrations, find Oracle NetSuite, and click Connect. Enter your NetSuite Account ID, then submit your Consumer Key, Consumer Secret, Token ID, and Token Secret to complete the connection.
Part A: Prepare NetSuite
Setting this up takes a NetSuite administrator a few steps on the NetSuite side before you connect: enabling Token-Based Authentication, creating an integration record with a role and access token, and saving four credential values. NetSuite only shows some of these values once, so save them as you go.
Enable Token-Based Authentication under Setup > Company > Enable Features (SuiteCloud tab).
Create or assign an integration role to an authorized user.
Create an integration record under Setup > Integrations > Manage Integrations > New.
Create an access token under Users/Roles > Access Tokens > New.
For the exact click-by-click steps, screen fields, and the full permissions table, see the NetSuite setup guide. That guide is the source of truth for the NetSuite-side configuration.
Part B: Connect Inside Zil Money
Open App Integrations
Go to Services, then App Integrations.
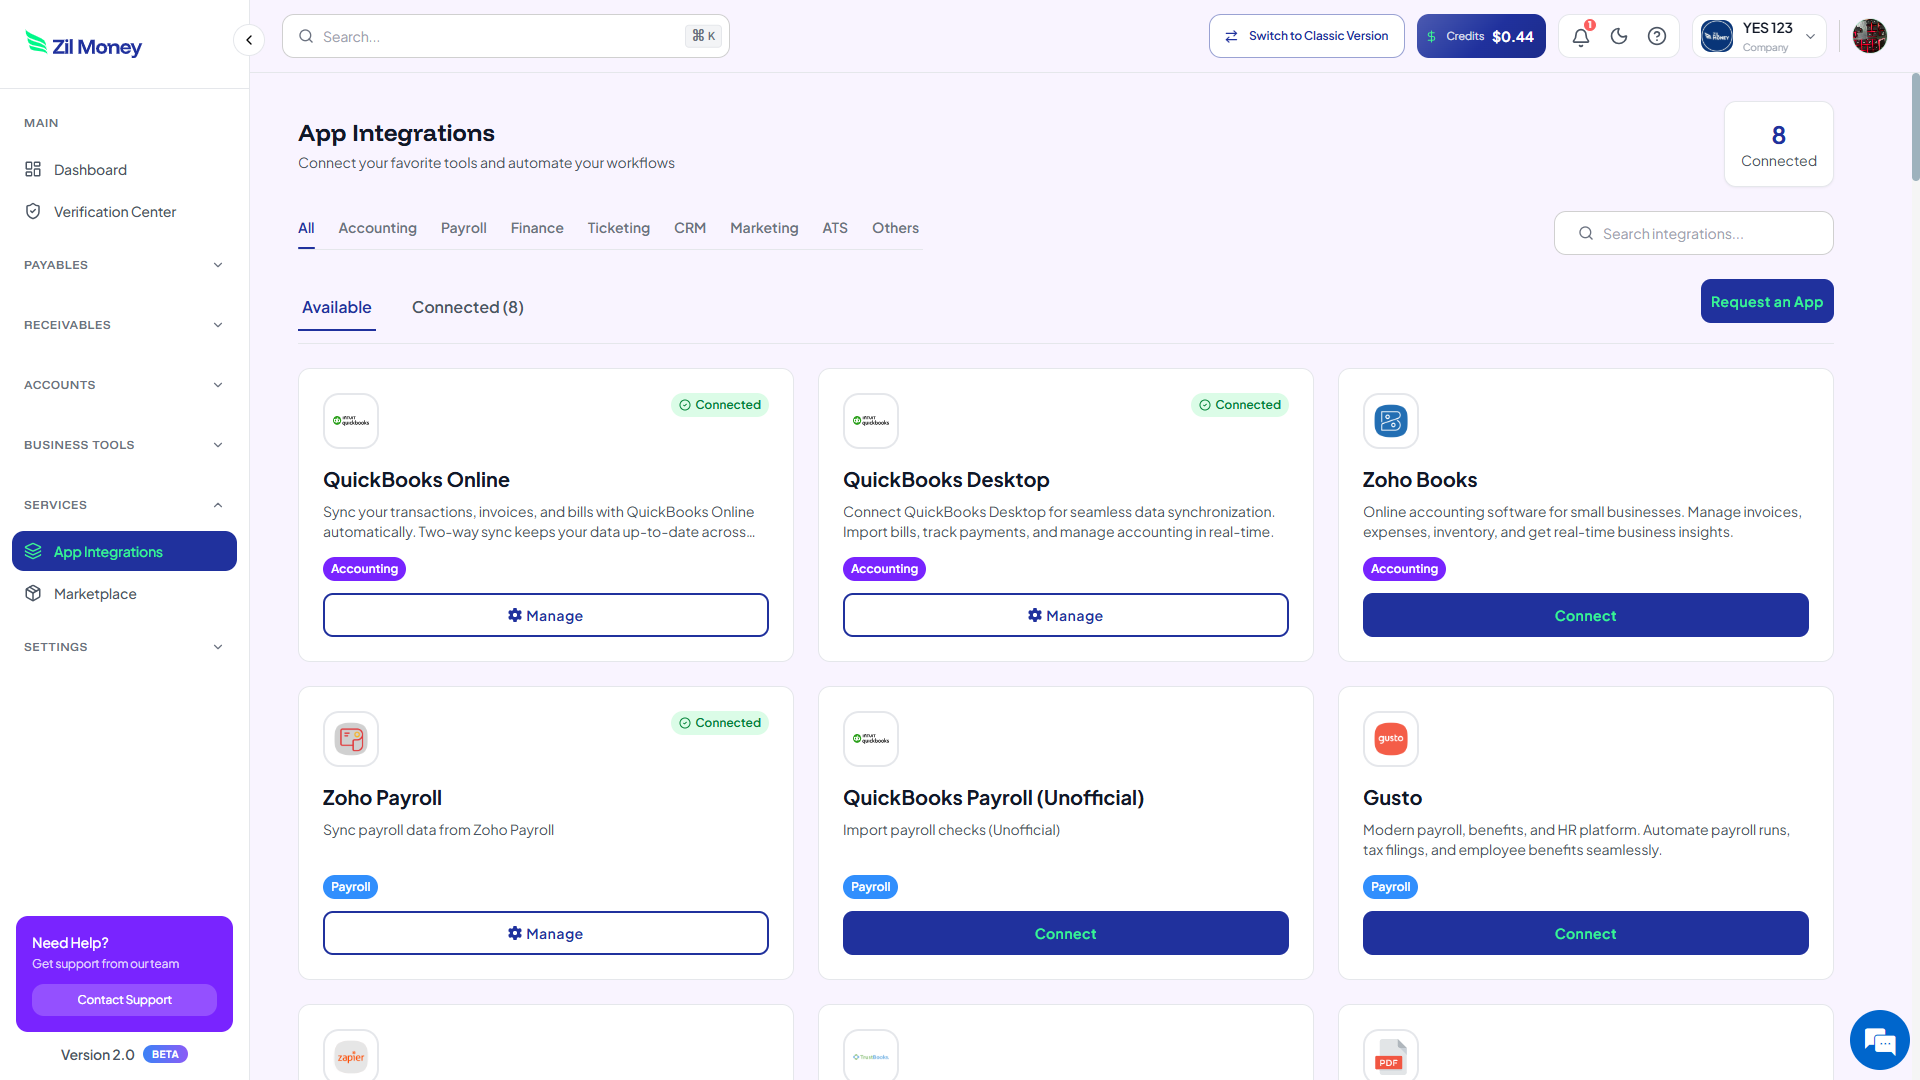
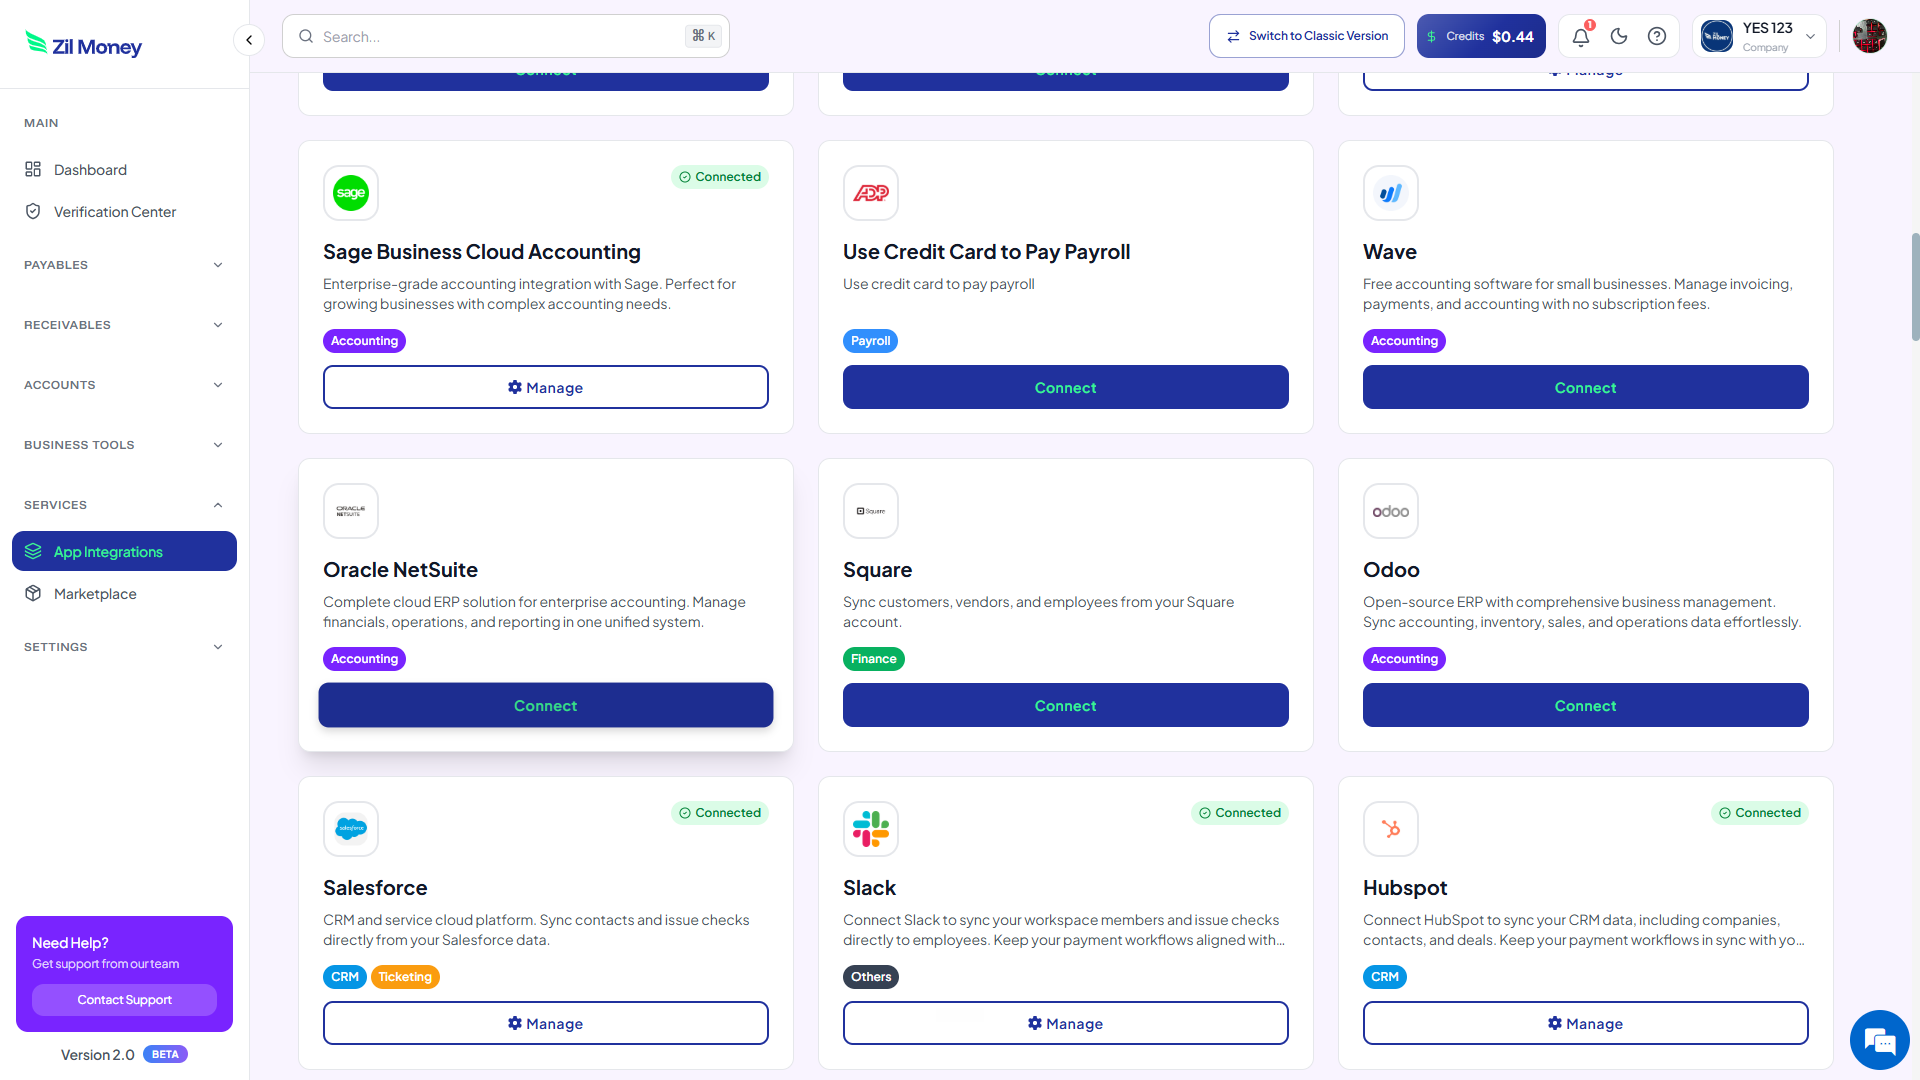
Find Oracle NetSuite
Locate the Oracle NetSuite card and click Connect.
Review and connect
Click Connect Oracle NetSuite to start.
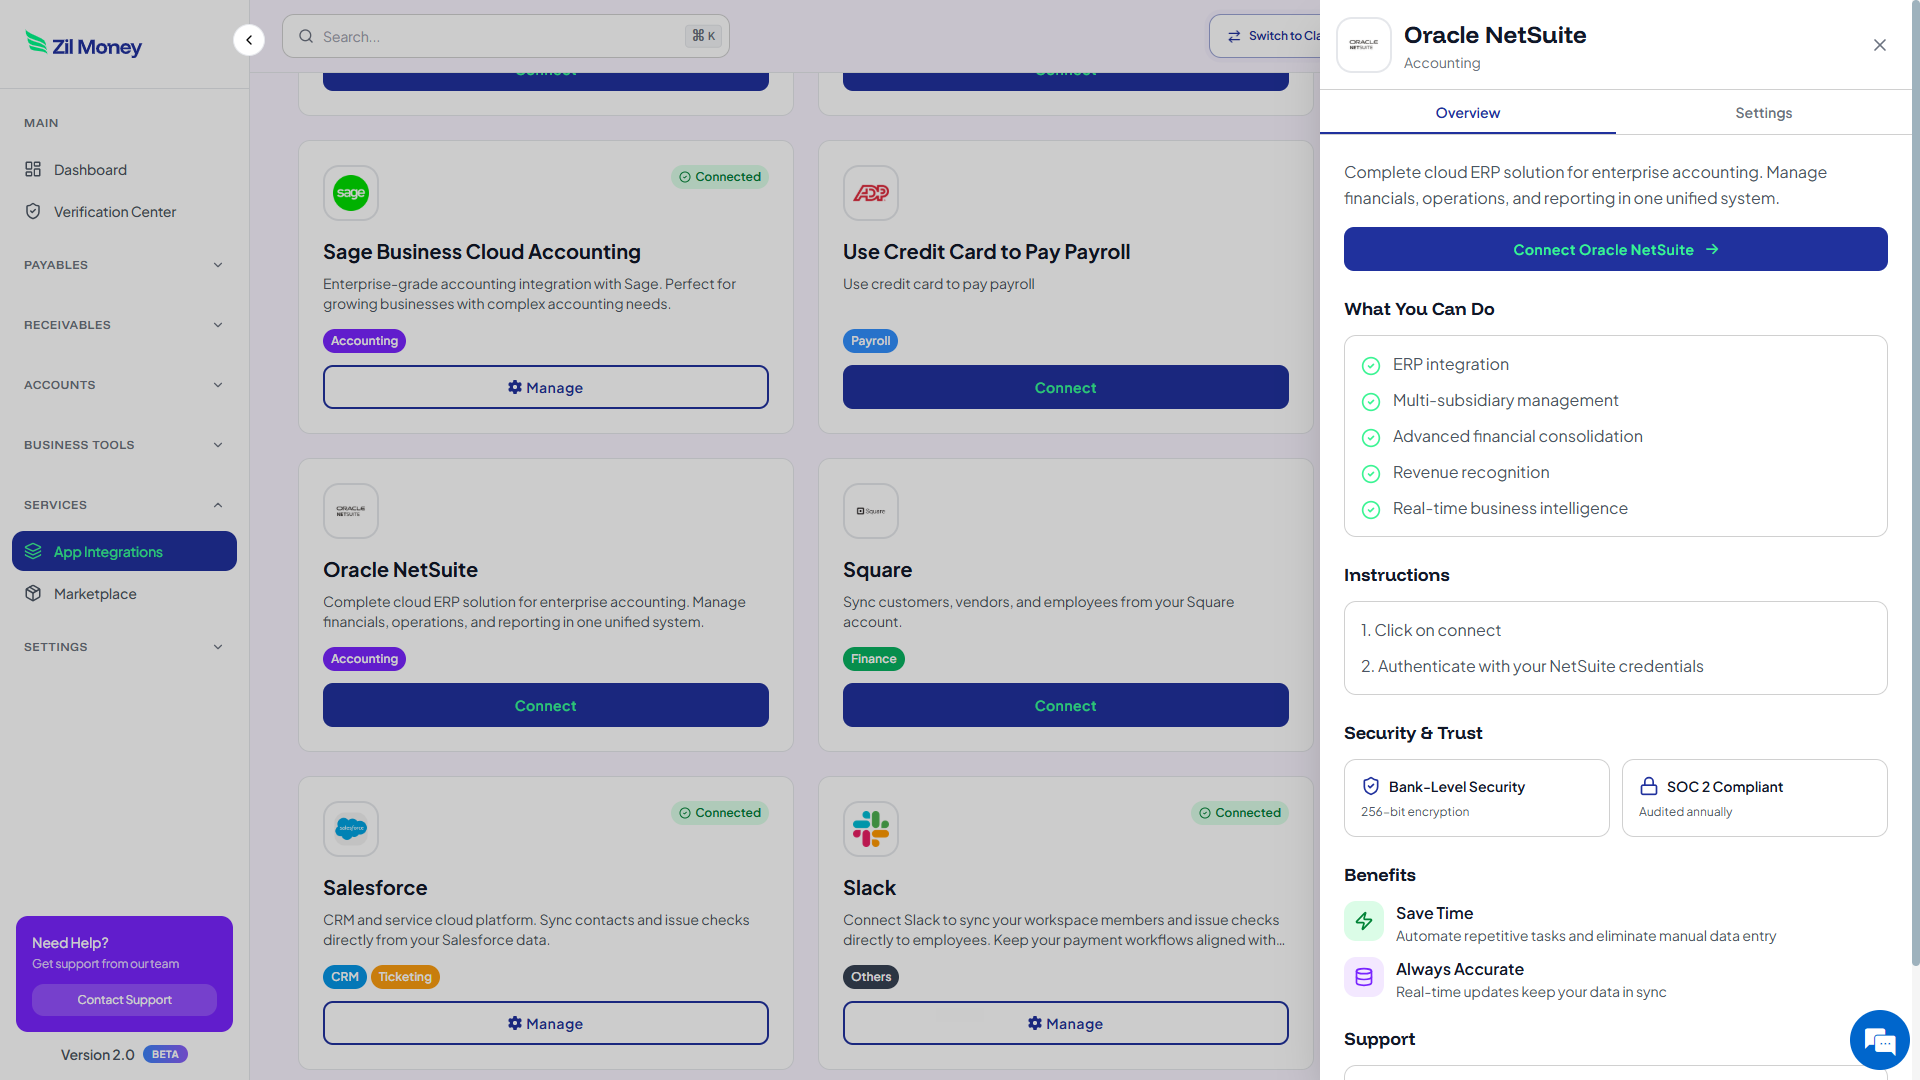
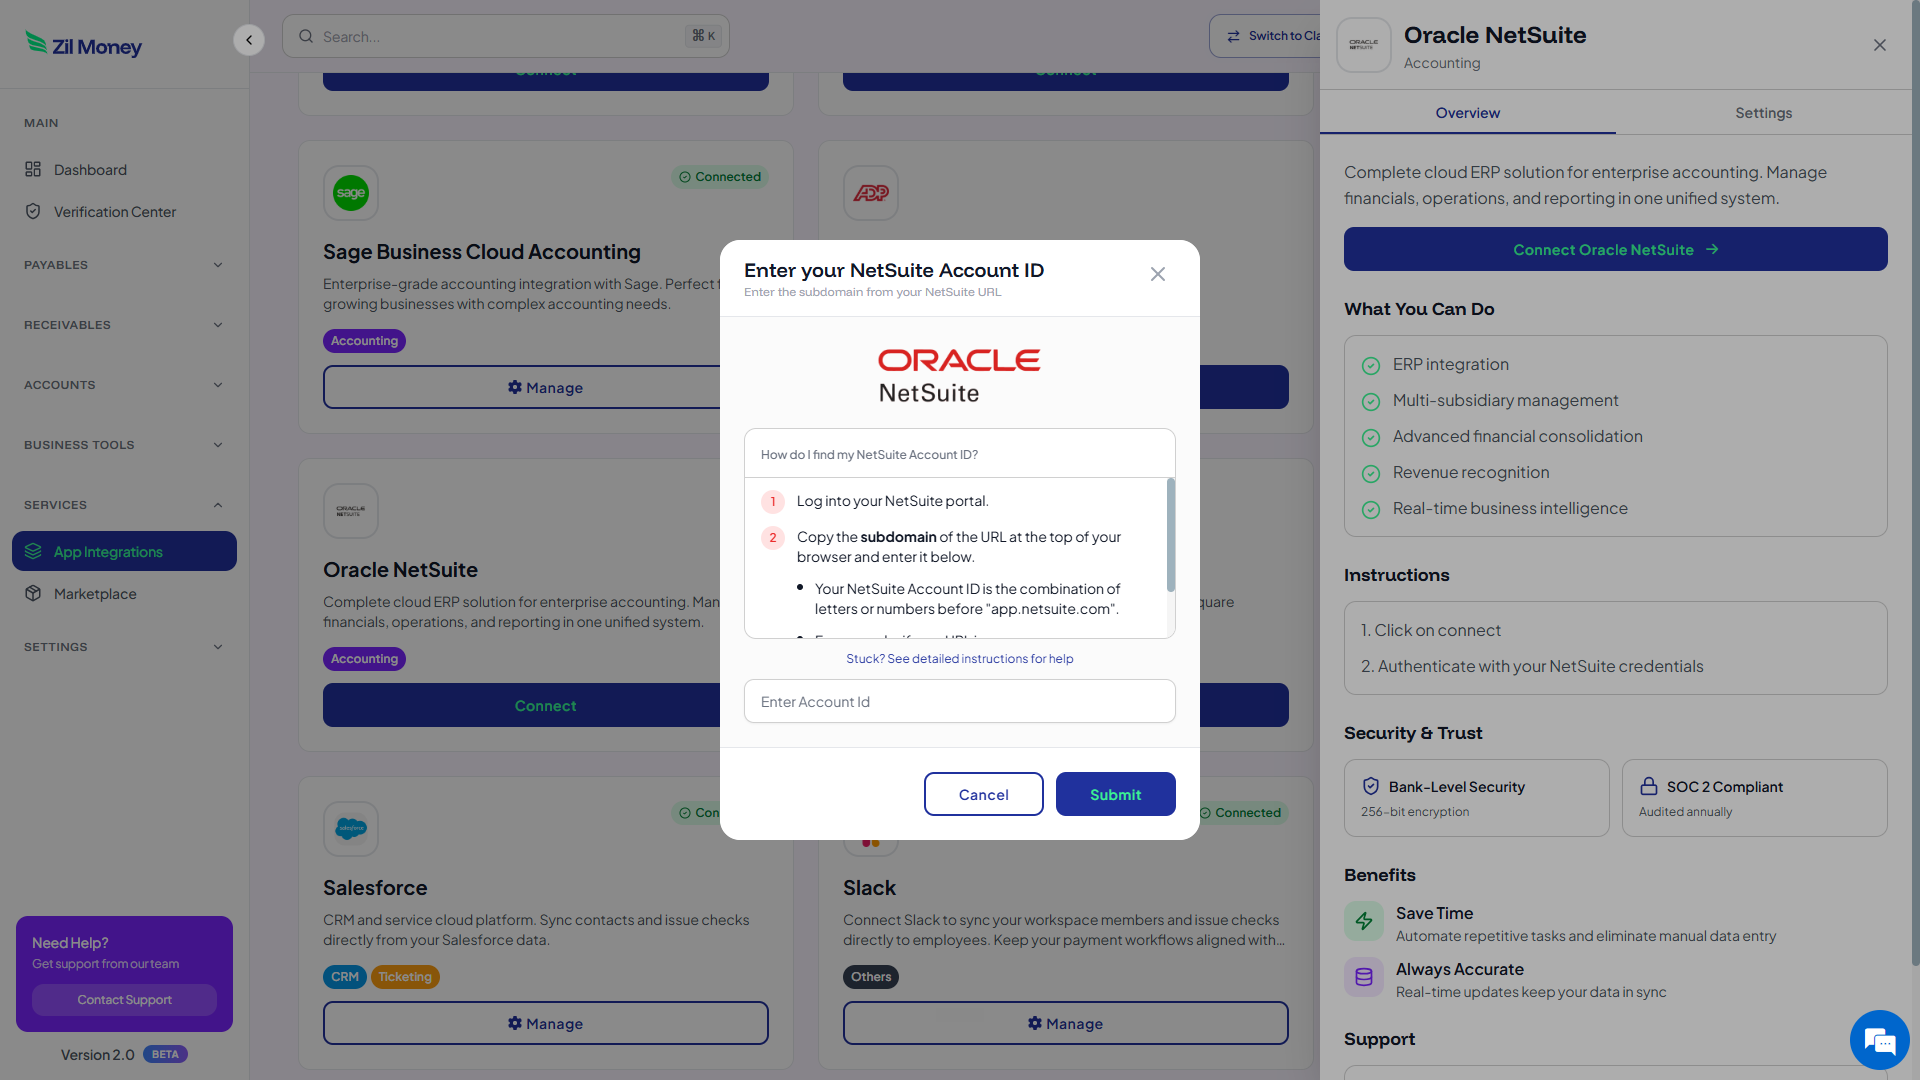
Enter your Account ID
Enter the subdomain from your NetSuite URL and submit.
Enter your credentials
Enter the Consumer Key, Consumer Secret, Token ID, and Token Secret, then submit.
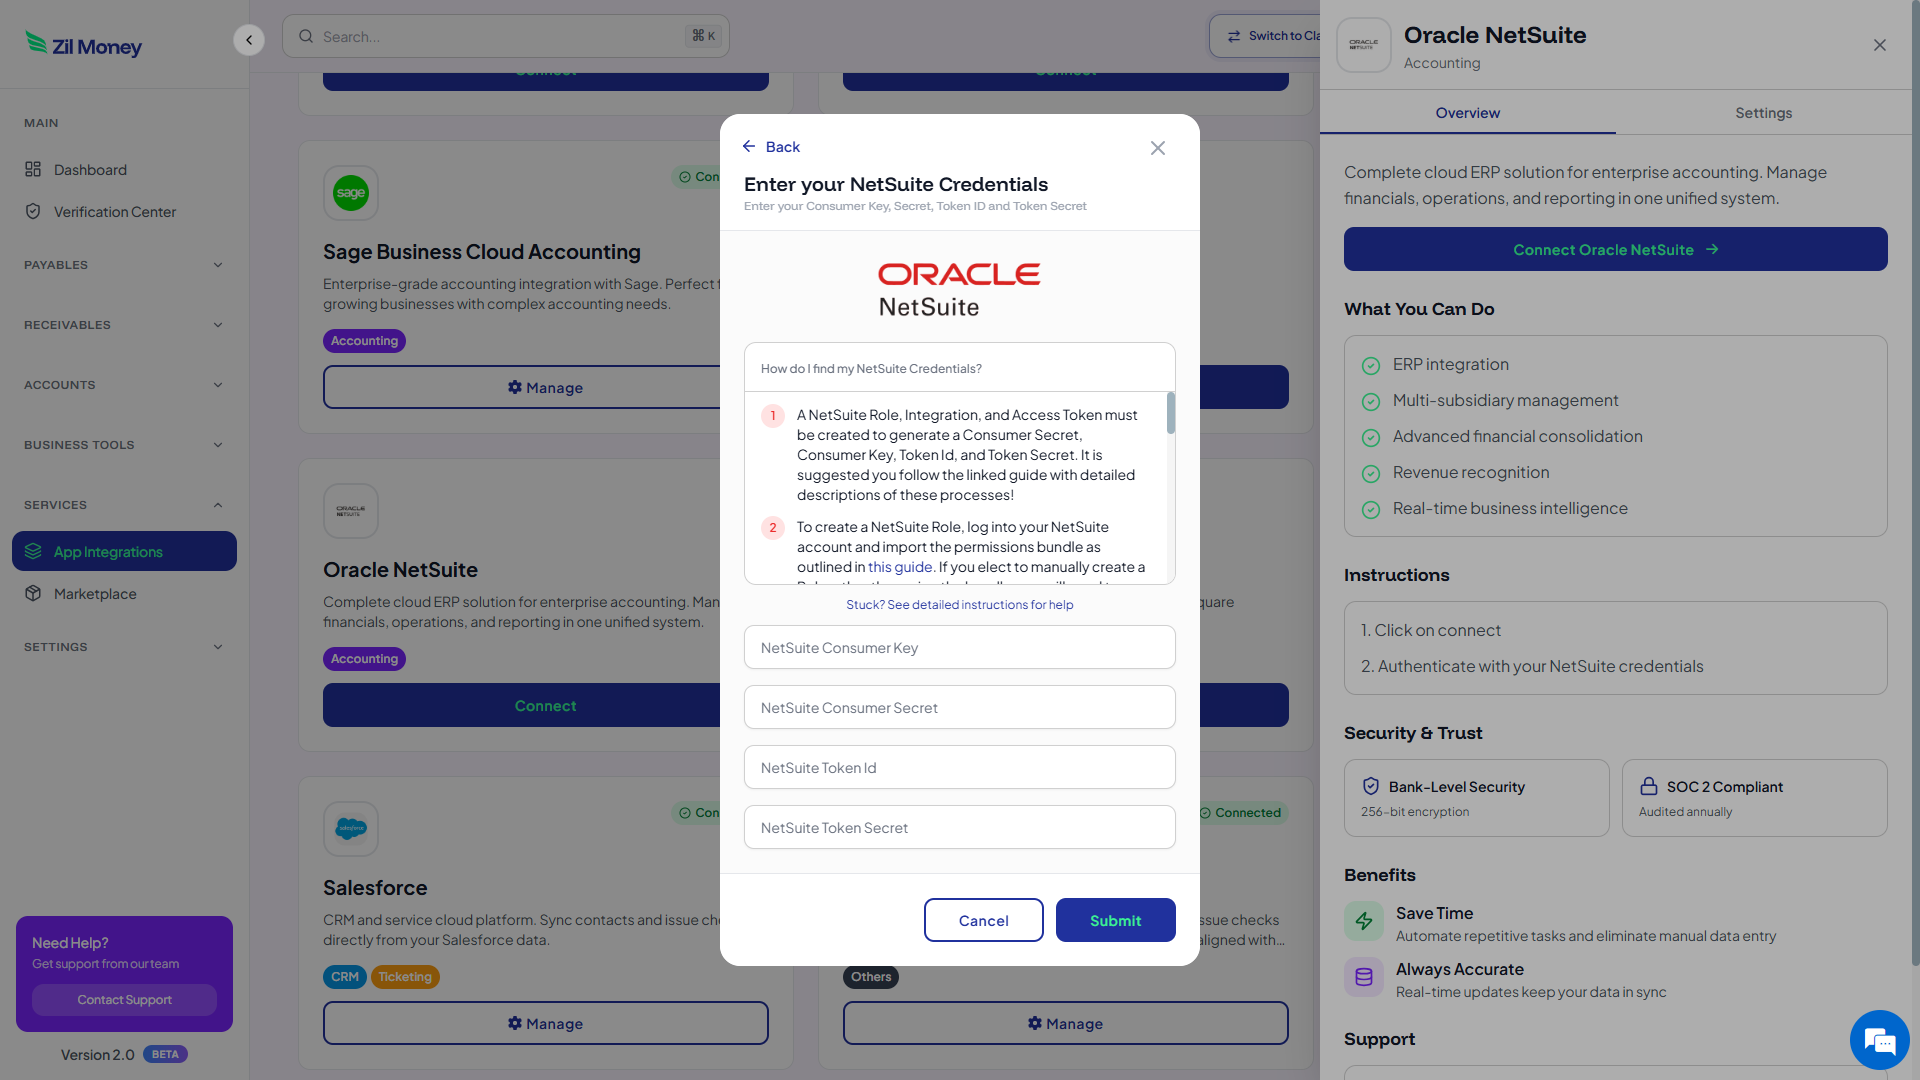
For NetSuite’s own documentation on Token-Based Authentication, see Oracle NetSuite’s official help center.
What Happens After Connection
After the connection is authorized, you can access the supported NetSuite import and payment options available on your Zil Money account: import supported payees, import supported bills, review imported payment information, select check printing, select check mailing, and review payment activity.
Available records, refresh frequency, and write-back behavior depend on your NetSuite and Zil Money account configuration. Payment status does not automatically write back to NetSuite unless confirmed for your setup.
Other Payment Options
Check printing and check mailing are the focus of this page. Depending on account approval and availability, Zil Money may also support other payment methods for the same vendor and bill information.
ACH
Electronic payment as an alternative to a paper check.
Wire transfer
For vendors that require a wire.
Digital check
Sent electronically instead of by mail.
Card-funded payment
Pay a vendor by credit card, subject to approval.
Credit card rewards are determined by your card issuer and are subject to your card’s terms and conditions. Payment eligibility is subject to review.
How the Connection Is Secured
Security controls, certification scope, and feature availability vary by product and service.
Who This Actually Helps
Accounts payable teams
Printing a stack of checks on a Friday? Import the bill straight from NetSuite instead of retyping the same vendor name a third time.
Remote finance teams
Nobody has to come into an office to feed a printer. Review, confirm the address, and send it for mailing.
Multi-location companies
Stop shipping printed checks to a regional office just so someone local can mail them.
Construction & job sites
Pay subcontractors on several job sites without a separate check run for each one.
Professional services
Still writing paper checks to the one contractor who won’t take ACH? Do it without leaving NetSuite.
Wholesale & distribution
Review and process several supplier checks from imported bill data in one session.
Healthcare organizations
Pay suppliers that require paper payment using bill data already sitting in NetSuite.
Check-only vendors
Keep the accounting record in NetSuite and still get the check into their hands, no manual detour.
Frequently Asked Questions About NetSuite Check Printing
Can I print checks from NetSuite using Zil Money?
Yes. After connecting NetSuite, you can import supported bill and payee information, review the payment details, and print the check from Zil Money.
Can I mail checks using NetSuite bill information?
Yes, where check mailing is available on your account. Import or select the bill, confirm the recipient address, and submit it for mailing.
What NetSuite credentials are required?
A NetSuite Account ID, Consumer Key, Consumer Secret, Token ID, and Token Secret, generated through NetSuite Token-Based Authentication.
Where do I find the NetSuite Account ID?
It is the subdomain shown in your NetSuite URL before “app.netsuite.com.” See the setup guide for a walkthrough.
What is NetSuite Token-Based Authentication?
A NetSuite authentication method that uses a Consumer Key, Consumer Secret, Token ID, and Token Secret instead of a username and password.
Can I import NetSuite vendors or payees?
Supported payee and vendor information can be imported. Exact field availability must be confirmed during setup.
Can I import NetSuite bills?
Supported bill information can be imported for review and payment. Exact field availability must be confirmed during setup.
Can I print multiple checks?
Processing multiple checks is available where supported by your account and feature access.
Do I need a NetSuite administrator?
Setting up the integration role, record, and access token generally requires NetSuite administrator access.
Can Zil Money mail checks directly to vendors?
Yes, where check mailing is available on your account and the recipient’s mailing address is confirmed.
How long does check mailing take?
Processing and delivery times depend on the selected mailing service, recipient address, and third-party carrier. Contact the Zil Money team for current timeframes.
What fees apply to check printing and mailing?
Fees depend on your plan and the services you use. Contact the Zil Money team for current pricing.
Can I track a mailed check?
Tracking availability depends on the mailing option selected. Check your payment activity in Zil Money for status details.
Does payment status sync back to NetSuite?
Not automatically, as far as this integration is currently confirmed. Treat it as a one-way import unless your integration team confirms write-back.
Does the integration support NetSuite OneWorld?
OneWorld and multi-subsidiary support must be confirmed with the integration team before setup.
Can I use custom NetSuite fields?
Custom field support must be confirmed during setup. Not all custom fields are guaranteed to be available.
How do I disconnect NetSuite?
Open Services, App Integrations, Oracle NetSuite, and use the manage or disconnect option. Contact support if you need help revoking credentials.
What should I do if imported bills are missing?
Check your NetSuite role permissions, confirm Token-Based Authentication and REST Web Services are enabled, and review any filters.
Is Zil Money an Oracle or NetSuite partner?
No. Zil Money is not affiliated with, endorsed by, or a certified partner of Oracle NetSuite.
NetSuite Check Printing Integration, Built Around the Bill You Already Approved
Keep your accounting records in NetSuite. Use Zil Money’s NetSuite check printing integration to print or mail supported vendor checks from one payment workflow.
Recent Comments